Showing posts with label Tip-It Tuesday. Show all posts

Tuesday, August 20, 2013

Tip-It Tuesday: Stamped Backgrounds with Dies

Hey everyone!

Happy Tuesday!! It's Tip-It Tuesday and I think today's tip is a FUN one that you're gunna love! Geometric shapes seem to be all the craze in card making lately. Chevrons, triangle, you name it. Today I am going to show you how to create stamped pattern backgrounds using your dies :D This is perfect for when you've got a shape you'd love to use for a stamped background but you only have it as a die and not as a stamp. Check it out:

Creating Stamped Backgrounds with Dies:

First I chose my die, I went with a chevron die from the Avery Elle Chevron Bits die set. I cut about a 3x3 piece of clear acetate (you can use any paper but the clear acetate allows you to see what your doing which can help you line up your pattern), and cut my chevron out of that. Ta-da! Stencil!:


Next I cut out the layer I wanted to stamp my pattern onto and I masked a space for my sentiment. To mask my sentiment I stamped my sentiment on a scrap, cut it out, and used a tiny bit of ATG on the back to hold it in place where I wanted it. This step is of course optional and will depend on your card design.


Now I began to create my pattern. To do this I placed my stencil on my card and then I used a makeup sponge to dab ink over my stencil (just dab the makeup sponge on the ink pad and then dab it over the stencil). I kept a wet wipe and paper towel near by so that I could clean my stencil between each color:


I continued until I completed the pattern. Then I removed the mask I had placed for my sentiment, stamped my sentiment, and done!

Check it out:


Isn't it fun?? And really SO simple once you get the hang of it!
This BIG sentiment is from Unity Stamp Company, grab it HERE.


I am linking this card up to CAS-ual Fridays' CFC112 challenge.


Alright sweet friends, that's all for today!
I'll see you back here tomorrow for Work-It Wednesday :)


Big bloggy hugs <3

Tuesday, August 13, 2013

Tip-It Tuesday: Masking Stamps

Hey everyone!

Happy Tuesday!! And welcome to another Tip-It Tuesday :D For today's tip I am showing you two super simple tips to mask when stamping. You may have seen both of these tips, but maybe you haven't! Check it out:

First tip when masking stamps: Put tape over parts of the stamp you don't want to use:


See that shiny spot? My sentiment originally said "God's timing is perfect" but I wanted to be able to use just the "perfect" so I used a simple piece of tape to cover up "God's timing is" while I inked the stamp. REMEMBER: Be sure to take the tape OFF before you actually stamp, or you will have a big ink blob next to your stamped image. I have made this mistake MANY times!

Now I will tell you, I did make a card to show you this technique, but I actually THREW it AWAY! That is something I have RARELY done. But hey, we all have our off days don't we?


Second tip when masking stamps: Place a shape over your card to leave an area unstamped:


You can do this with any shape, and leave yourself the perfect spot for stamping a sentiment!

Check out what I created: 


This beautiful flower is from the Unity Stamp Company Stamp of the Week. You can only get it if you are a Stamp of the Week member! So be sure to check out the stamp of the week!!

You can grab this sweet sentiment stamp HERE.

I am also entering this card in the Runway Inspired Challenge #41.


Alright sweet friends, that's all for today!
I'll see you back here tomorrow for Work-It Wednesday!!


Big bloggy hugs <3

Tuesday, August 6, 2013

Tip-It Tuesday: Any Color Mist Spray

Hey everyone!

Happy Tuesday!! For today's Tip-It Tuesday I have a variation on my Any Color Glimmer Mist Tut. If you recall, I mixed pearl glimmer mist with my alcohol inks to create a custom color glimmer mist. Well then I thought, what if you don't want the glimmer but you still want a custom colored mist? And so today's tip was born :) Instead of mixing my alcohol inks with glimmer mist, I found this Tim Holtz Pearl Mixative. I found it right along with the other alcohol inks, but it seems to be a slightly thicker mixture, which is perfect. I mixed the mixative with a few drops of the desired color alcohol ink and ta-da! Check out what I created:

As you might have guessed, my project is similar to my glimmer mist tut project, as a I had a very similar need when making this card. This past weekend my boyfriend's parents celebrated their 32nd wedding anniversary! I created this card for them :)


I used my Silhouette to cut out the 32. I sprayed the background with my homemade mist, and then splattered a little bit of straight alcohol in on it for good measure. I also did a tiny splatter on my top layer with the cut out numbers, and then I popped up the adorable heart stamp from Unity Stamp Company and finished it with some sequins. You can't see it, but I also stamped "Happy Anniversary" on the inside using my Unity Stamp Company stamps.


Alright sweet friends, I know it was a simple tip today but I hope you enjoyed it!
I'll see you back here tomorrow for Work-It Wednesday!!


Big bloggy hugs <3

Tuesday, July 30, 2013

Tip-It Tuesday: Braided Chevron

Hey everyone!

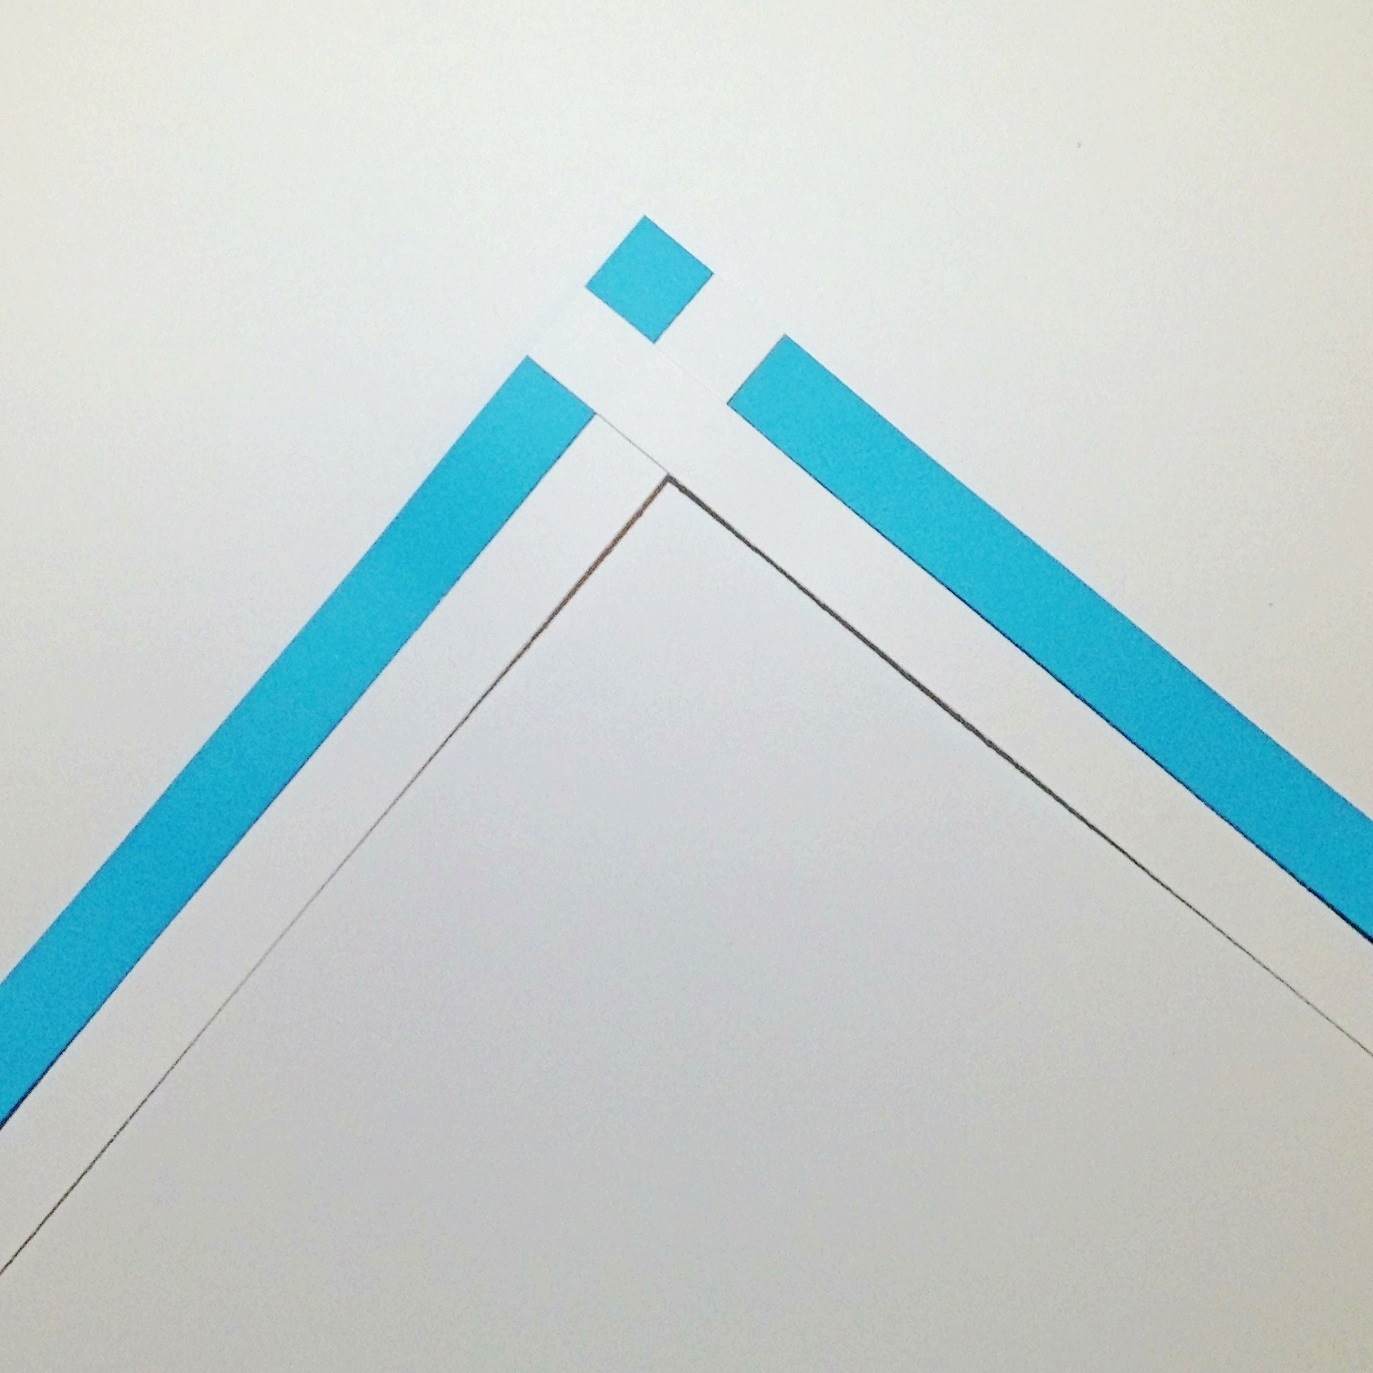
Happy Tuesday!! For today's Tip-It Tuesday I am going to show you how to make the chevron background that I used on Saturday's card. It's just a real quick picture tutorial. Check it out:

First you will need to cut two 1/2 inch strips of each color you are using. The length of these strips will depend on how long you want your finished chevron to be.

Next you will want to glue two of your strips of the same color together in a right angle, and glue one of your strips of the other color right next to the strip on the left. Like so:


See how the left blue strip is on top and I glued the white strip right next to it?

Now you want to glue your last strip on top of all of these, right next to your strip on the right. Like so:


Now we're going to braid. You will grab the strip that is the farthest to the right and fold it over like so:


And then the one on the left:


And then you will simply continue until you've reached your desired length:


Pretty simple, no? It may not seem like it at first but once you do it you'll be flying through them like it's nothing!


So are you ready to see another card using this fun technique? Here's what I created:


Isn't this stamp adorable? I used the Unity Stamp Company "I'm Here" Itty Bitty. And of course I wrapped my card with a little bit of Totally White Trendy Twine.


Alright sweet friends, that's all for today. I'll see you back here tomorrow for Work-It Wednesday :D


Big bloggy hugs <3

Tuesday, July 23, 2013

Tip-It Tuesday: A Follow-Up

Hey everyone!

Happy Tuesday!! I am SO sorry, I don't have a new tip for you today :( Being on vacation with the family is finally catching up with me (blogwise anyway), and unfortunately I seem to have caught a bug and I've been feeling pretty sick the last couple of days. I had been fighting it but yesterday I finally accepted that I was sick, so I've fallen a little behind. BUT I would HATE to disappoint you guys, so I hope you will accept this tip follow up in place of my regular tip!


Remember last week's tip about stamping on pottery?


Are you ready to see the finished product??

Check it out!!


I LOVE how this turned out! It looks just like I hand painted the adorable phrases, but if I actually had you wouldn't be able to read them, lol. And I think the ice cream scoop in the bottom is just TOO cute! In case you forgot, these adorable stamps are from the Sweet Stamp Shop Cool Scoop stamp set (which is on clearance right now!).


Alright sweet friends, I hope you enjoyed this little project. I WILL be back for Work-It Wednesday tomorrow, PROMISE!

AND I will make sure to do an EXTRA good tip for you next week!


Big bloggy hugs <3

Tuesday, July 16, 2013

Tip-It Tuesday: Stamping on Pottery


Hey everyone!

Happy Tuesday and welcome to another Tip-It Tuesday here at MTE! Today I have what may seem like a bit of a strange tip, but as you know I'm on vacation with my family this week, and I couldn't resist sharing with you how I used my stamps in an unusual way!

Every summer I visit Lake Tahoe with my family. CHECK out the view from our condo:


GORGEOUS, no? And every year (seriously, EVERY year) we paint ceramics. Of course, even on vacation, I have a small stash of craft supplies with me. So this year, I had an idea...

This week's tip: Painting on Ceramics!


So first things first, gather your supplies:


Supplies:
1. Ceramic piece to paint (I chose a mug/bowl, I LOVE these!)
2. Stamps! (I chose Sweet Stamp Shop's Cool Scoop set, perfect for an ice cream bowl!!)
3. Paint

That's all you need!


Next, paint the base colors on your ceramic piece:


Ooo pretty :)


Now it's time to stamp!
I placed my stamp on a small acrylic block because I had a flat enough surface to stamp on normally. My mom was also stamping on her piece but she had to pass on the acrylic block and handle the stamp manually because of the curve of her piece.
You won't be able to dip the stamp in the paint the way you would normally press it on an ink pad. Instead, I lightly brushed the paint onto my stamp:


And now you stamp!
Quick tip: be sure to apply even pressure, if your piece curves a little, you may want to "rock" the block a little to match the curve.

And finally, you will want to clean up the stamping by hand with a small detail brush.

Check out my finished product (pre-firing anyway!):


It looks like I have amazing painting skills and I was able to "hand write" the phrases, but it was actually a stamp! Lol!

I also stamped a single scoop of ice cream in the bottom of the bowl:


SO cute right?? Keep in mind (especially if you've never painted ceramics before) that the paint colors will change a little and the whole piece will be smooth and shiny after it has been fired.

My number one tip to keep in mind when stamping on ceramics: DON'T expect perfect!
This creates a wonderful hand painted look (NOT a "perfect" look) and is a great tool for those of use who have no painting skills what-so-ever!


I'll be sure to share the finished product later this week!!


Alright sweet friends, that's all for today! I'll see you tomorrow for another Work-It Wednesday :D

Big bloggy hugs <3

Tuesday, July 9, 2013

Tip-It Tuesday: Any Color Glimmer Mist

Hey everyone!

Happy Tuesday! And welcome to the FIRST ever Tip-It Tuesday here at My Thoughts Exactly :D If you read my post yesterday and entered my giveaway then you know I asked you all which weekly segment at MTE you were most excited about. I expected most people to say Freebie Friday (who doesn't love freebies?), but I was surprised to see that so far you're actually most excited for TODAY! That's pretty cool :) (But now the pressure is ON for good tips!!).


First of all let me tell you a little about Tip-It Tuesday. Every Tuesday I will be sharing a TIP, TRICK, or TUTORIAL with you. MOST of these will probably be little tips, though I do hope to grow into doing more tutorials for you (in fact, if you have a tutorial you'd like to see, please email me! If you send it, I will make it :P). Now sometimes you might read a tip or trick and go "Uh, DUH, I knew that already," but my hope is that every Tuesday I will help SOMEBODY, and that most of the time you will be saying "Oh, COOL, why didn't I think of that?"


Ok, ok, ON to the TIP!

This week's tip: Make ANY color glimmer mist!!

Now I know there are tutorials out there to completely make your own glimmer mist. If you're the kind of person who's willing to do that, this tip probably isn't helpful for you. Personally, I am way too lazy to do that. BUT I still love to save money, and let's face it, Glimmer Mist is pricey. PLUS I usually want my Glimmer Mist to match my project, not just any old run-of-the-mill color.

So here's what I do:


1. Buy ONE bottle of Pearl Glimmer Mist
2. Buy a couple bottles of alcohol ink
(I went for the basic rainbow, I would definitely get your primary colors if nothing else)
3. Buy mini reusable spray/spritz bottles of your choice
4. Pour SMALL amount of Glimmer Mist into spritz bottle
(NOTE: SHAKE Glimmer Mist before pouring it in)
5. Add a few drops of alcohol ink
(The more drops the darker the color. MIX colors to get exactly what you want)
6. Shake it up
7. BAM. Glimmer Mist in ANY color you want WHEN you want it.


Wanna see this baby in action? Check out this card I made for my dad's 51st birthday:

See how beautifully the grungy (glimmer grunge?) background matches the Twisted Teal Trendy Twine?? I love it! And as you can see, once again I used a wonderfully witty stamp from Unity Stamp Company, Consider Yourself Vintage. Seriously LOVE these stamps!


I hope you enjoyed this first ever Tip-It Tuesday :D

If you've got an awesome tip you'd like to share, I'd LOVE if you would email me! I'll be looking for Tip-It Tuesday GUEST BLOGGERS!! There's never just one person who has all the amazing ideas is there?


Don't forget to check out my FIRST post and enter my Blog Relaunch GIVEAWAY! Lots of yummy goodies up for grabs :D


Big bloggy hugs <3