

Hey everyone!
Happy Tuesday!! For today's Tip-It Tuesday I am going to show you how to make the chevron background that I used on Saturday's card. It's just a real quick picture tutorial. Check it out:
First you will need to cut two 1/2 inch strips of each color you are using. The length of these strips will depend on how long you want your finished chevron to be.
Next you will want to glue two of your strips of the same color together in a right angle, and glue one of your strips of the other color right next to the strip on the left. Like so:

See how the left blue strip is on top and I glued the white strip right next to it?
Now you want to glue your last strip on top of all of these, right next to your strip on the right. Like so:
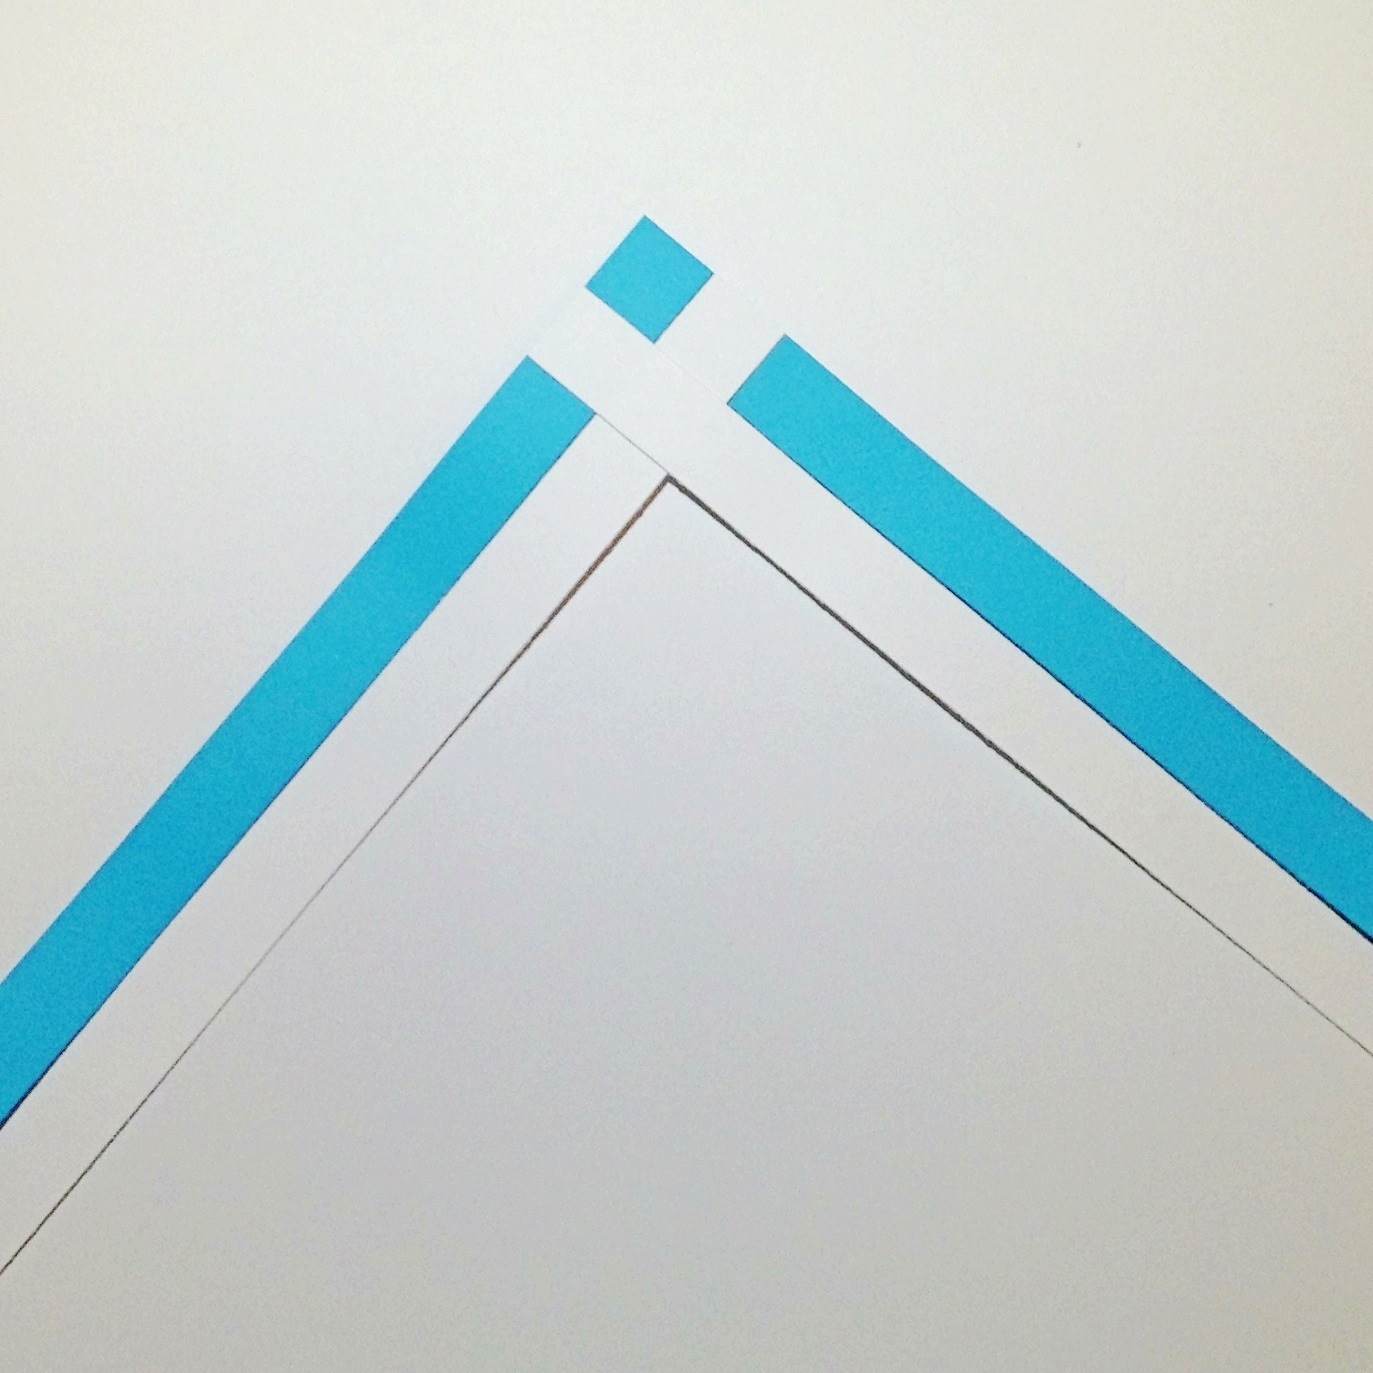
Now we're going to braid. You will grab the strip that is the farthest to the right and fold it over like so:

And then the one on the left:

And then you will simply continue until you've reached your desired length:

Pretty simple, no? It may not seem like it at first but once you do it you'll be flying through them like it's nothing!
So are you ready to see another card using this fun technique? Here's what I created:

Isn't this stamp adorable? I used the Unity Stamp Company "I'm Here" Itty Bitty. And of course I wrapped my card with a little bit of Totally White Trendy Twine.
Alright sweet friends, that's all for today. I'll see you back here tomorrow for Work-It Wednesday :D
Big bloggy hugs <3

That's pretty cool! Thanks for the tutorial.
ReplyDeleteOMG, It's soooo awesome!
ReplyDeleteWhy is there no video people can't just look at the pics and just do it and i think theses are fake comments that the person that made this website madm it you dont even put any words
ReplyDelete